We've all been there: You ask students a question, and one student raises his or her hand and says "Can I go to the bathroom?"
My first year teaching, my school had a well-oiled system for preventing this: Hand signals. Students were taught from the first day of school the proper ways to ask to use the restroom and get water. Now, instead of interrupting the teacher during a whole group or small group lesson to go to the restroom or get water, the student simply needed to use a silent hand signal. Imagine a world where a raised hand actually meant that a student had a question or an answer! ;) Even the three and four year olds would not interrupt a school-wide performance to scream "I HAVE TO GO TO THE BATHROOM!!!" They simply put up the hand signal and looked at their teacher, who would nod yes or no.
I love using these hand signals. Two years ago, I made some signs for these hand signals to help my students at my new school learn them too. I keep them taped low along the left side of my BrainBoard (SmartBoard) so that they are in plain sight for my second graders. Even students who are new to the class (sidenote: Why do I get new students once a month?!) were quickly able to learn how to use the clearly labeled hand signals.
And then I was moved to ESL.
While most of the students were still able to read the signs and use the signals, I had a student (let's call him Kevin) who changed everything I knew about classroom signs. Kevin moved to Texas from Brazil, and spoke not a single word of English. He also happened to be nearly deaf in BOTH ears, AND his hearing aids were broken. His vision was also partially impaired. Oh. And in Brazil (bless his naughty little heart) he was in a SpEd-only school. But since he had no paperwork in the US, I had to do my best to serve him until he could get what he needed.
Teaching him English was harder than usual, since he could not hear the words were were saying. While he was only in my class for three or four months before he moved again, he only learned a few words of English, and NONE of my hand signals. He seemed to think the symbol that was supposed to be for the restroom was what you used to tattle on someone. Oy. This showed me that I CLEARLY needed a better display of classroom signage for hand signals.
Cue the signs with pictures. This summer I spent some time adding pictures next to each of my hand signals to help my students who can't yet read, and those who do not speak English. I know this will help aid in comprehension for years to come. Will I make my ESL students eventually learn how to ask for the restroom in English? Of course. But for a little while, they will have the security of knowing that they can easily ask for their basic needs.
Here are some examples of the hand signals that I use in my room!
Restroom: Sign language R. Although, let's be real, I tell the students you make your fingers look like legs that look like they're doing a "potty dance." This is a much better visual for them to remember ;)
Tissue: Two fingers. Not sure why it's two fingers, but that's what my old school used, and it just sort of stuck with me!
Water: Sign language "W". No explanation needed. Unless you're 7, and then you need to have it explained to you.
I Need Something: A fist in the air. I created this one so that students can ask for permission to get out of their seat from across the room. This is by far the hardest one for them to remember to use, since they just want to get out of their seat!
Comment/Story: One finger. This is for them to use when they have a very important and totally related to the lesson story to share. This helps me know who to call on when I want an actual answer to something I asked, not a random story.
Question/Answer: Hand raised. The usual. I do have to explain this to them usually, because they don't realize that when they raise their hand, they are usually always putting up five fingers! We also call this a "silent five" because the five fingers shouldn't be accompanied by a mouth talking ;)
Here are my NEW posters with pictures!
If only little Kevin had these when he was in my class, his life would have been much easier. If you'd like to purchase these super cute signs, I have both versions together in a single pack on TPT! I'm slowly turning my room into Neon RAINBOW themed, so check my store frequently for new items that match. I recently uploaded this cute clip chart, too! Click the words under the images below to find the items on TPT!
Well. The past few days have been a whirlwind of activity both for this itty bitty blog as well as my Instagram. I'm feeling a little starstruck because Reagan Tunstall of Tunstall's Teaching Tidbits shared my photo of how I organized her guided math/monthly centers for second grade. It got so many likes on her Facebook and Instagram, and she was kind enough to repost it and tag me. This meant that I gained a huge amount of followers! If you are one of those people, thank you!! A lot of people started asking questions about how I organized the inside, the binders, etc., so I made a quick video about it all!
#FilmedOniPhone6
It was definitely the boost I needed to start actually posting on this blog again. I even gave it a redesign :)
This morning I decided to add a little more organization to my math centers, and as I snapped a picture for Instagram, I decided I'd snap a new more pictures and create a blog post so that I could really explain my thoughts on the guided math org.
The picture that started it all...
How I Organize My Unit Materials
I was lucky in that I taught summer school this summer, so I had some time to give my organization and these lessons a test run. The green boxes are Sterilite brand, and I purchased them at Target. While my local Targets keep these regularly stocked, many people have told me their Target doesn't have these exact ones. I did a little searching online, and apparently you can get some blue ones in a five-pack from Home Depot. Amazon has a six pack in blue for a better price. Unfortunately, Target doesn't even have the green ones on their website :( Someone else told me that their local Dollar General has them though. I wish I could be more helpful!
For each unit container, I put the spine labels on the short edge of the box, taped on the inside. Then I printed the cover and taped it on the inside of the lid facing up, like in the picture below. This allows me to distinguish which unit is inside each box even from the top. On the back of the lid, I taped the standards page that Reagan provides for each unit. This will make it easy if I need to know exactly which standards I'm teaching in each unit simply by grabbing the lid (see picture below).
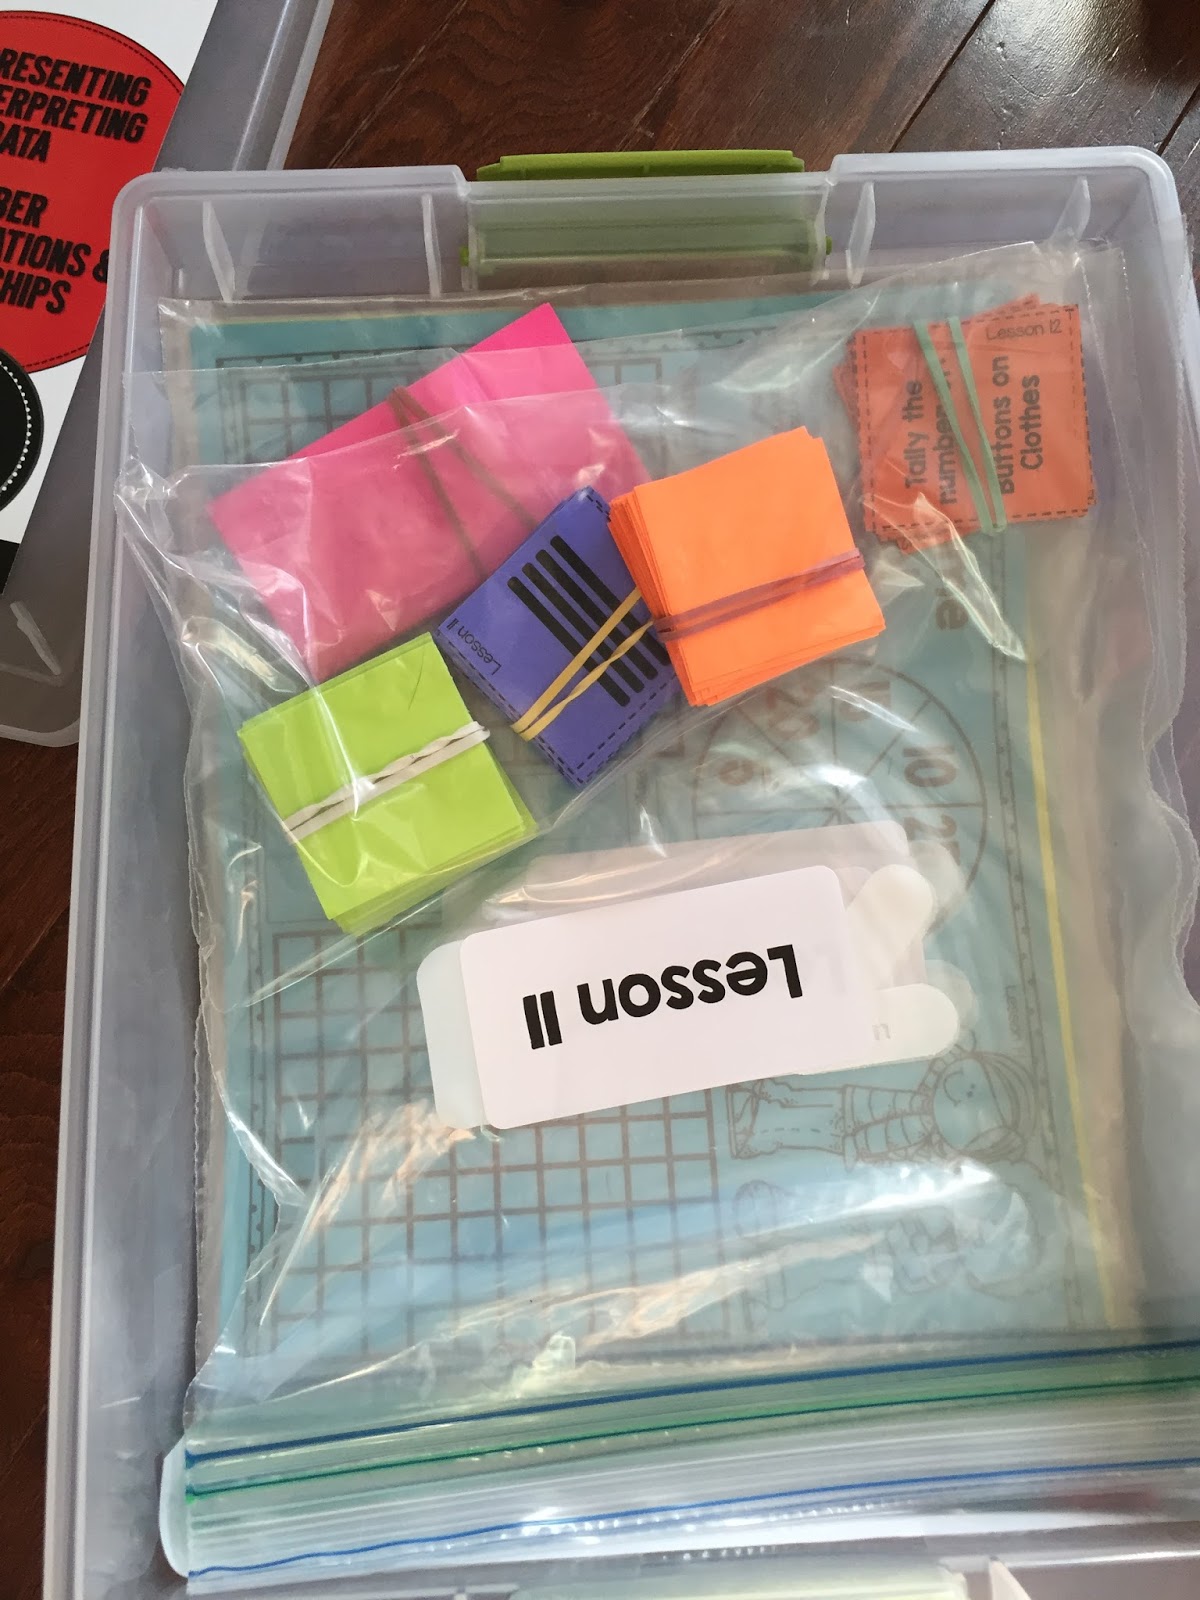
Here is what it looks like on the inside of my box. As you can see, Unit 1 is pretty hefty! I really had to squeeze everything in there for it to fit. When I first open my unit box, I have them organized so that the next lesson is on top (Lesson 1 for now). I used Avery 8463 shipping labels to label each bag. I typed Lesson 1-19 on two pages of labels (they have 10 on each page), and used one label to write "Unit Materials". I hate my own handwriting, which is why I used labels to avoid having to write things. You can see in the picture above, I have a sandwich sized bag with precut squares of different construction paper that are used in multiple lessons in unit 1, so I placed these in the front. Any materials that are used multiple times throughout the unit, such as workmats, I placed in either a gallon or sandwich sized bag and put it right in front so that it was easy to access. Note that the bag in the picture above doesn't say "Unit Materials" with a label on the front, but it should... that was a later inspiration :)
Sticker Added!
19 lessons
Inside each gallon bag, I have the lesson materials either in a quart bag or rubber-banded together. If the unit was particularly large, like this one, I stacked the second half of the lessons in the opposite direction to make more room!
Lessons Flipped Backwards
How I Organize my Unit Binders, Printables, and Journals
I put each unit in a 1 inch binder. I printed the cover and put it in the front (duh), and used spine labels.
Front
For the back cover, I printed the standards page and slipped it in there. I wanted it to be easy for me to know which standards I was teaching in case I needed to write it somewhere.
Back
For the inside, I have each page inside a page protector. I feel like went through at least 2 or 3 100 packs of page protectors for all of the units... but it's so worth it. When I was teaching summer school, a kid spilled his chocolate milk all over the binder... but it was protected, so no harm done! The first page of every unit is Reagan's daily warm ups (included in each unit). In summer school, I had a binder clip hanging over a pushpin tacked onto my front board, and I switched out the warm up activities for each unit. When you're sone with a unit, you put the warm ups page back in the binder and put the new one up (keep it in the page protector). These are awesome! Since summer school was short, I changed units every week, but my kids still loved all of the different games, and I loved how it was a great review for them!
Warm ups page
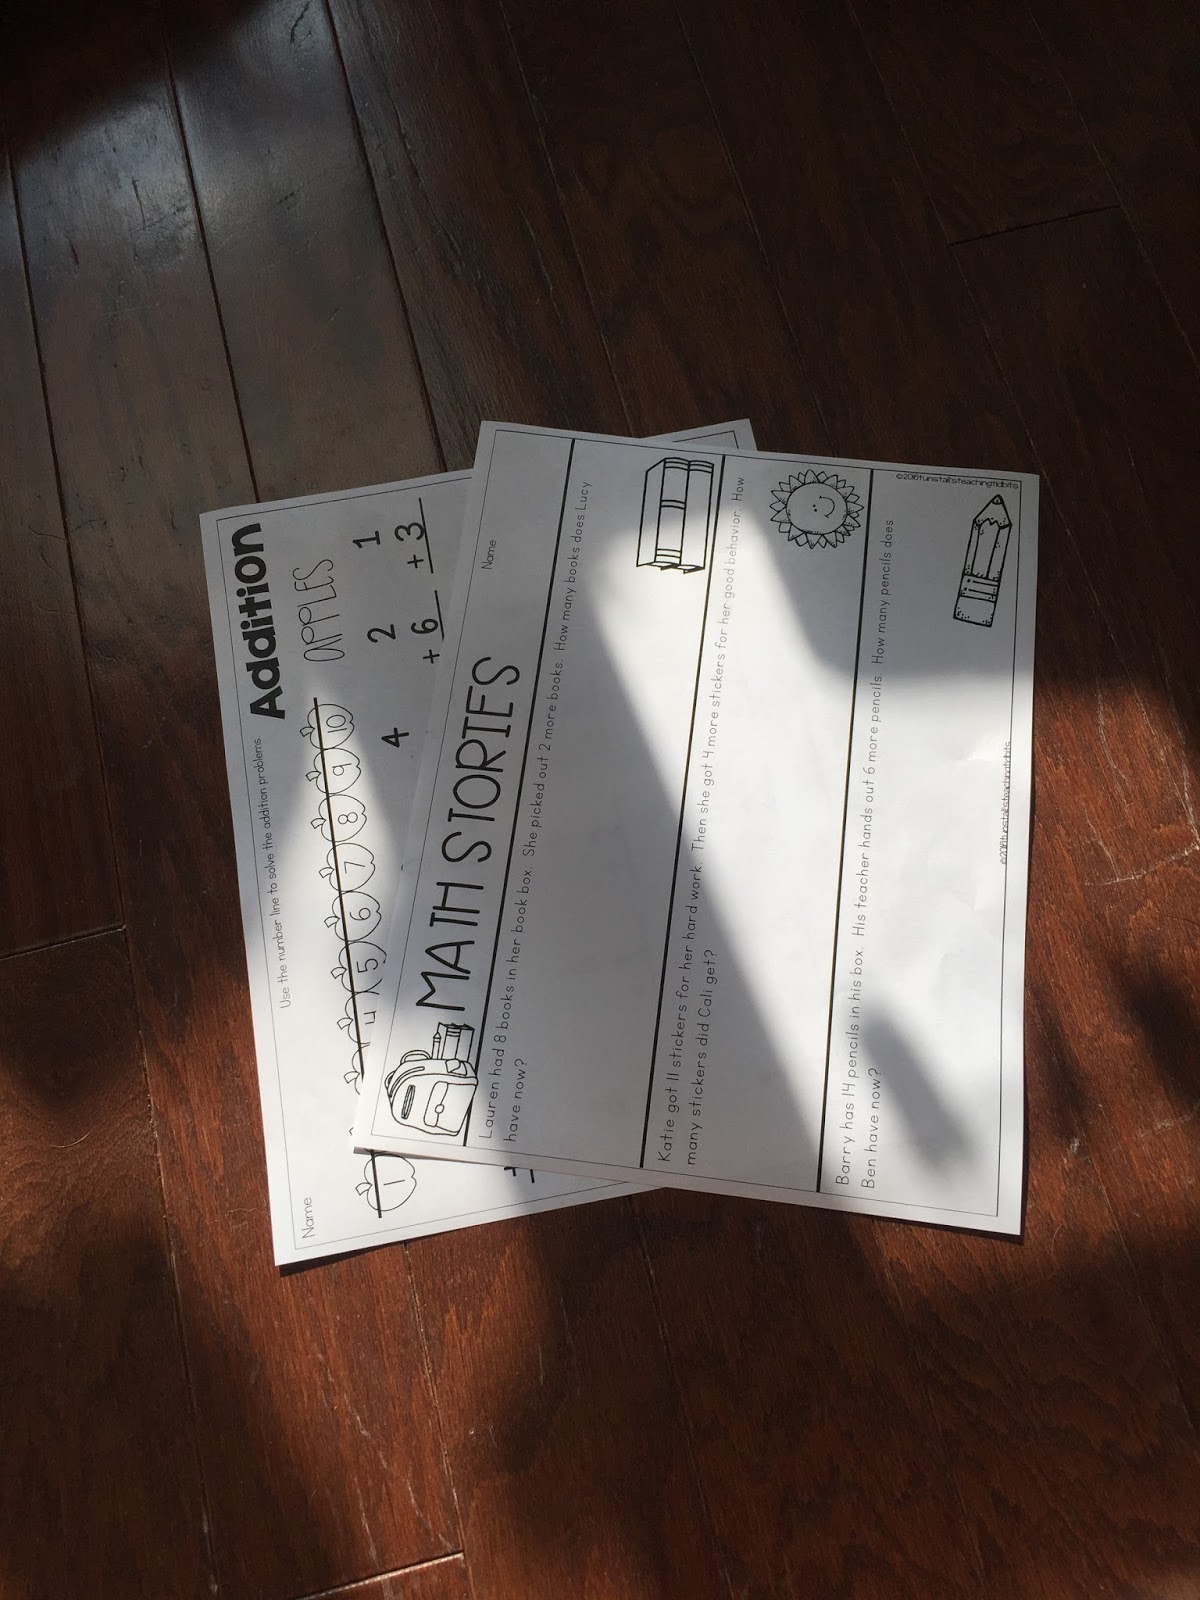
Next, every five lessons (about a week) I put a page for math journals and a page for printables. Reagan's centers bundle comes with ten themed journal pages for each month. I also have her bundle of math journals for second grade. I printed all of it out, and took some time during the summer to put a good mix together each week of themed activities and year-round activities. I picked five per week, put them in a stack, and tucked it behind the green paper. Behind the blue "Apply Station" page, I put 2 to 4 of the monthly printables. I didn't put five, mainly due to the fact that I only have Reagan's 10 per month at my disposal, but also because I plan on using pages out of our district math workbook as well. Otherwise, there are lots of free worksheets from websites like Math Salamanders that can be printed. These pages help me plan for a week at a time. This was very helpful in summer school, because I could just grab the stack and go. At my school, we can't make our own copies, we must give them to a wonderful lady who works the copy room with a request sheet. This is both a blessing and a curse, but it definitely means no last second copies! This method worked great for me in summer school because I could just slip the week's worth of pages out and put it in my stack of copies, with directions to just make each stack of worksheets a different color :)
Journals
Journals that were tucked behind the green page
Worksheets
Only 2 - room to add more!
If you're curious about the "Apply" and "Journal" stations, I follow Reagan's method of math stations, which you can read about here. It's awesome - I use her reading stations too!
As for the rest of the binder, I have each lesson in it's own page protector. I store any printables behind each lesson, though I make sure to display them. If I don't see the printables, I won't know that I need to make copies! If there is more than one printable that goes with the lesson, I use a second page protector to make sure I can see each one. It helps for planning too!
Stored front and back
Finally, lesson 20 for each unit is an end of unit assessment. These are fantastic, because they copy the same activities that students have already done at your small group table, so there is little explanation needed! I store these with each page separate as well. In summer school, I found that this made it easier to flip to the assessment and check the format, or know if I needed to spend extra time on an activity because they would be assessed over it. And as a side note, I found it to be much easier to give the assessments in small group vs. whole group. I tried it both ways over summer, and it was definitely easier in small group. It helps their nerves to do it at the teacher tables (with privacy dividers of course). It also allowed me to closely monitor them, read instructions, and stop them if they misunderstood instructions and explain them again. This boosted their scores on the assessment because the instructions were crystal clear!
Some assessment pages
How I Organize the Monthly Centers
I organize my monthly centers in the same way as the unit boxes. I put the covers on the outside, and on the inside, instead of unit standards I put the list of games and the skills covered. This will help me see at a glance the various skills I can have my students practice. I used Photoshop to edit the covers to be "binder spines" for my boxes. Lucky for you Reagan just uploaded the centers spines for FREE on her TPT - they now come with several choices for "spines"! You can find links to them at the bottom of this post.
Cover on lid
Spines
List of centers on inside
As you can see from the picture, I have my centers in gallon-sized bags. Inside the gallon bags, I put any large game boards and the instructions card. I also put the small pieces in sandwich or quart sized bags and put this inside. When it's time to change out a center, I just pull all materials from the bag, add a spinner, dice, or whatever the center needs, and then I'm ready to go. It occurred to me as I took that picture that I could make stickers to label the bags as well. That's what I did this morning to further organize my centers.
More labels!
I simply typed the name of the center, and then in a different font, I typed what skill it has my students practice, based on what Reagan typed on the lid. Now I will know exactly which stations are out based on which bags are empty! This will also help me flip through the bags until I find the skill I want.
Labeled and Ready!
Sidenote: I could NOT have gotten through so much this summer without a paper cutter! After nearly buying a huge expensive one from an office store, I found this one at Walmart! It was only $25, and works great!
Swingline ClassicCut Lite Guillotine Trimmer
You can find it at your local Walmart, or buy it online here. The one online is green like my boxes ;)
I hope this helps anyone struggling to organize their guided math materials! You can purchase the guided math units, centers, and journals from Reagan Tunstall at the links below!
I know I just posted today, but I wanted to skinny up another of our favorite recipes from the archives to each this week, and what better place to save the information than on the internet?! This pasta dish also uses asparagus and frozen peas, which are going into another of the meals from this week, so I am creating less food waste AND saving money by buying a smaller mix of ingredients!
We LOVE the Spring Tortellini with Cream Sauce. It's quick AND delicious. However, it's also 626 calories and 21 SMARTPOINTS. Holy cow! I'm going to see what I can do to skinny up this recipe. I'm no mastermind like Gina at SkinnyTaste, but I can do a few simple things to help this dish.
First of all, when I calculated the recipe using this tortellini, here is the nutritional info that I got:
Nutritional Info
Servings Per Recipe: 4
Amount Per Serving
Calories: 502.6
Total Fat: 22.5 g
Cholesterol: 96.9 mg
Sodium: 458.1 mg
Total Carbs: 52.2 g
Dietary Fiber: 3.3 g
Protein: 23.8 g
SmartPoints: 16
This is vastly different than the values that they posted! I'm not quite sure where the discrepancies are, or which one is more accurate. However, I went ahead and subbed fat-free half-and-half and compared the results:
Nutritional Info
Servings Per Recipe: 4
Amount Per Serving
Calories: 417.5
Total Fat: 11.9 g
Cholesterol: 57.7 mg
Sodium: 490.3 mg
Total Carbs: 54.0 g
Dietary Fiber: 3.3 g
Protein: 24.0 g
SmartPoints: 12
Using the fat-free half and half made a HUGE difference! I also tried subbing the sausage tortellini by this whole wheat kind:
Nutritional Info
Servings Per Recipe: 4
Amount Per Serving
Calories: 423.4
Total Fat: 12.5 g
Cholesterol: 79.9 mg
Sodium: 647.3 mg
Total Carbs: 52.4 g
Dietary Fiber: 3.3 g
Protein: 27.2 g
Smart Points: 12
So, using whole wheat pasta doesn't change the points value. The calories increased slightly, as did the fat, cholesterol, AND sodium. The carbs were reduced, and fiber surprisingly stayed the same. Protein did increase by a few grams.
I'll be sticking to my tasty sausage tortellini, thanks :P
I will be making the recipe this week with fat-free half and half for sure! If you're wondering, we are also using a few other recipes from SkinnyTaste, other than the pesto I listed in my last post:
I've recently been trying this new "subscription" service called CookSmarts. Unlike other services, you don't receive anything in the mail, but it is entirely online. It is a service that gives you four recipes per week, ususally with intertwining ingredients. This creates less food waste because you plan your meals. It also gives you a list of things you can chop/prep on Sunday to make the meal cooking during the week SO much faster. If you're a novice to cooking and/or meal planning, they also have helpful videos of how to do some of the techniques they mention in the recipes. If you're interested in signing up, you can click here.
Well, I've SUPER enjoyed these meals! It's been really nice to change up our usual food rotation so much! Unfortunately, I have gained THREE POUNDS since their meals aren't as "skinny" as the meals we had been eating. So I decided to take matters into my own hands and start to "skinny-up" some of the recipes! This week, I'm starting with the Monday meal, Oven-Baked Pesto Risotto.
Per tablespoon, their pesto comes out like this:
Nutritional Info
Servings Per Recipe: 10
Amount Per Serving: 1 tbsp
Calories: 185.9
Total Fat: 20.4 g
Cholesterol: 0.0 mg
Sodium: 1.0 mg
Total Carbs: 2.1 g
Dietary Fiber: 0.9 g
Protein: 1.2 g
SmartPoints: 6
Yikes!!! While I'm sure it's super delicious, this week I am going to go for a much skinnier option using my favorite food blogger, Skinnytaste.com. You can find her recipe for pesto here. Here is how her pesto rolls out, per tablespoon:
Nutritional Info
Servings Per Recipe: 10
Amount Per Serving: 1 tbsp
Calories: 81.4
Total Fat: 8.3 g
Cholesterol: 3.2 mg
Sodium: 74.9 mg
Total Carbs: 0.7 g
Dietary Fiber: 0.3 g
Protein: 1.9 g
SmartPoints: 3
Yeah, definitely going with the SkinnyTaste version!
The pesto was the main thing putting unnecessary calories into this dish. I was going to use chicken broth vs. chicken stock, but after checking the carton in my fridge, the chicken broth only adds about 10 calories per cup, and no fat at all!
The CookSmarts version of the risotto recipe has 626 calories, or 19 SmartPoints.
Using the skinny pesto, the risotto comes out to: 500 calories, and 15 SmartPoints. Sounds much better to me!
For the Garlic Panko Crusted Fish, I'm on the fence. I have never enjoyed fish very much unless it's literally caught that day. But when you sub chicken breast for fish, it raises the calories by nearly 200! I am trying to decide if we are going to be brave and try the fish, sub TWO chicken breasts and butterfly them to make four (and thereby cut the chicken calories), or if I will make the vegetarian version (stuffed tomatoes) for myself and make chicken for him.
If you're wondering, with the skinny pesto the fish version turns out to be 464 calories and 14 SmartPoints. Curiously this is the same value that they claimed the regular version is... which may just be a discrepancy in brands calculated, etc.
We aren't interested in the lamb cups or the shrimp gumbo this week, so you're on your own for skinnying those up!
Yeah.... I haven't blogged these in a while. When you're engaged, buying a house, and a teacher on summer vacation, blogging about clothes is the last thing on your mind! But it truly helps me get better results, so I'm going to start again!
First off, I was extra excited to get this fix because I skipped my last (bi-weekly) fix. It just wasn't in the budget, and since it was summer and I had no more trips planned, I didn't "need" any new clothes.
I also have issues with being patient.... so I may or may not always peek online at what I'm getting. And then I might or might not Google the product names to see what it is I'm getting.... oopsie.
Anyways. I do this because I'm excited, but I can also gauge how much I might be spending. If I like 3-4 things in the fix, I know to conserve my clothes/beauty/etc. budget for the rest of the week so I can purchase the pieces. This time when I Googled, I knew I wouldn't be keeping more than 1 MAYBE 2 things.
Let's get started.
First off, It was a much larger box than usual. I had already peeked though... so I knew it was because I was getting a bag.
I like big boxes and I cannot lie...
Sure enough, this was what was inside!
I started with the item on the top right - the one I KNEW I was going to keep. I didn't even have to google it to know that this Hanneli Polka Dot Swing Skirt by Pixely would be the newest member of my closet. I find it VERY hard to resist polka dots.
IT IS NAVY. WITH WHITE POLKA DOTS. It's perfect. I got a leetle nervous when I looked at the tag and saw it was a small... that meant I HAD to wear it at my waist, not my ginormous hips. And usually when I wear skirts at my waist, they get a bit too short to teach 7 year olds in. But I grabbed a new white top I had from H&M and tried it on.
Ignore the clothes behind me.. trying to sell old clothes!
Did I mention that it is perfect? It's hard to see from the picture above, but worn at my waist it is still nearly to my knees, so PERFECT for teaching in. The pleats and the silhouette of the skirt (tiny at my tiny waist, flared out and loose to keep my big hips and thighs a secret) seriously made me fall in love. I tried it with another new white shirt from H&M after the fiancé made a comment implying he didn't like the lace shirt (too bad for him (; )
YAY!!!!!
Next up was the Kamile Jersey Ruched Detail Dress from Gili. Based off of the picture, I was 75% sure I wouldn't like how the dress looked on me.
Like a good little Stitch Fix girl though, I tried on the dress. And, as usual, I was very glad I did. After squeeeeeeezing into it, I ended up really liking it. Unfortunately, it was just a tad too small. I checked the tag, and sure enough, it was an XS when I am normally a small. Not sure why! I'd LOVE to get this back in a small! The same blue color is fine, though the red would be great too. I lack both of those colors in my closet. Please send again, stitch fix stylist!
Next was a second dress, one that I was 99.9999999% sure I wouldn't like because of the weird way the stripes look at the tummy.
But again, like a goo girl, I tried on the Betsey Abstract Stripe Fit & Flare Dress by THML. And I extra failed to be impressed for a few reasons:
The fabric was not my favorite. I like soft, comfy, flowy fabrics, not scratchy grass-looking fabrics
The top tapered in more than a normal dress, so my bra straps would have been showing if I didn't tuck them in. Maybe I could wear a different special bra, but not to work. I wear normal bras to work to teach.
Again, it was a tad too small, since I was sent an XS for some reason!
Once I got past those things, it wasn't that bad, actually. But too many reasons to not keep it!
The last clothing piece I tried on was this Himsbury Crew Neck Blouse by Crescent. I couldn't tell with this one from the picture how I was going to feel about it.
First off, I have mentioned several times that I have PLENTY of tops. I always seem to be sent one...though they tend to be super cute so it's ok sometimes. Secondly, I thought it was just a solid blue top...until I looked at the hem on the picture and discovered it had a pretty pattern on the back or something. Sure enough, this is what it looked like when I pulled it out:
I dunno. I LOVE LOVE LOVED the shape of the blouse. The way it was more fitted at the top (though again, almost slightly too small) and flared out a bit at the bottom hid my large hips very well. I LOVED the blue, and I LOVED the pattern.... just not together. It was weird that you could see the pattern from the front, and weird that the blue was half on the back. I asked my fiancé for a second opinion, and he agreed. So back it goes.
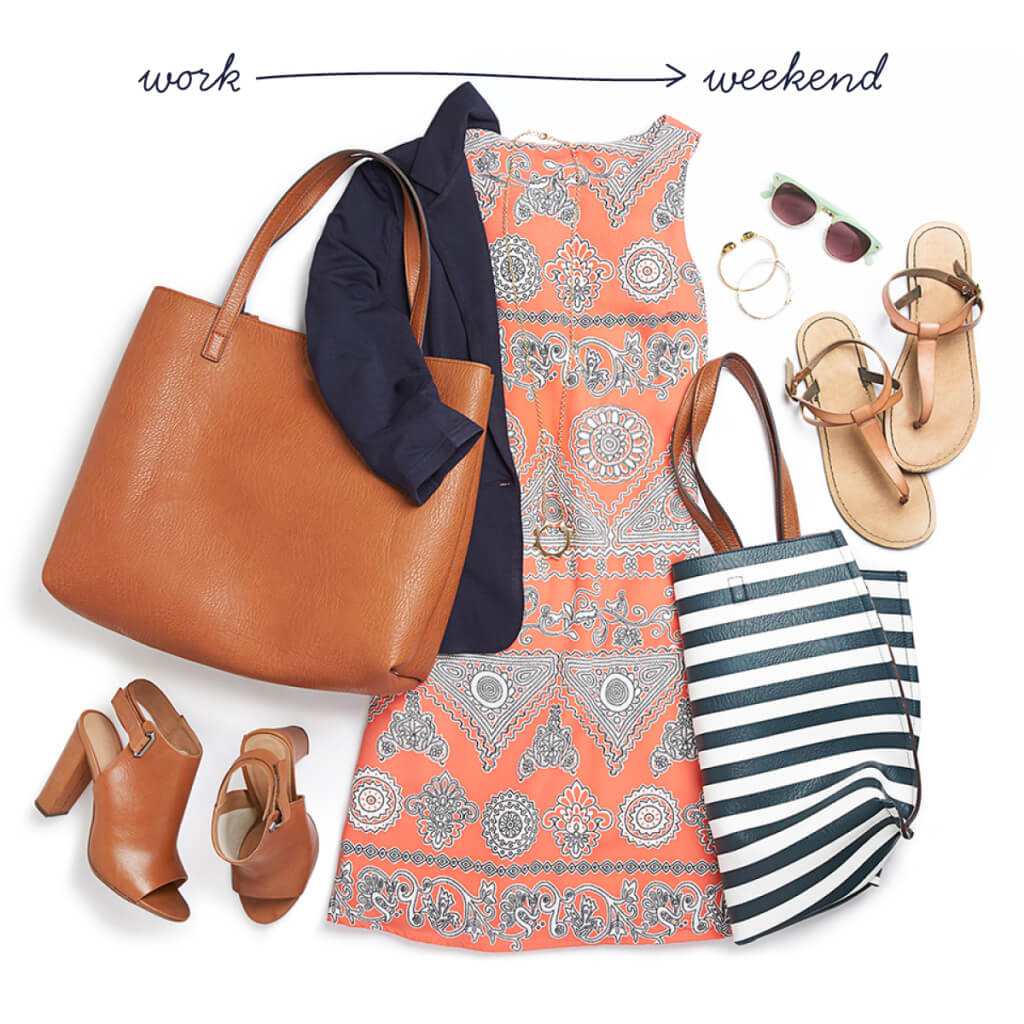
Finally, I requested this Jacey Striped Reversible Bag from the Stich Fix blog. I LOVE how it mixes my favorite shade of brown leather with cute horizontal stripes! It's more versatile because it's reversible. When I Googled the bag, it mentioned that it even came with a mini bag for inside storage! I was hooked!
Same bag, two ways!!
Unfortunately, they were out. Seriously, every time I have requested a specific item from their blog, they never seem to have it :( I was sent this Erik Striped Tote Bag by Street Level.
Omg. I hated this bag, y'all. When I took my peeky peek at my online checkout, and got over the initial disappointment over not getting the Jacey bag, I googled this one. And I noticed that the stripes are vertical instead of horizontal, and the whole thing is canvas or something. No leather, no brown. I figured I'd try it, but probably not keep it since it wasn't as versatile. When I opened the box, I was HORRIFIED.
It is made out of a hideous grass-like fabric. As I mentioned about the striped dress, that is NOT my thing. I like sleek and leather bags....not hempen monstrosities. Sorry to whoever sees this and likes the bag, and sorry to the stylist, but this is NOT a proper sub for the bag. Next time just send another dress or skirt instead!
I just don't like the vertical stripes. AND the inside was a cheap liner, like one you might get in a Target bag. Just SO not my style for bags. I loved that it was big enough for a planner, though.
All in all, I ended up only keeping the perfect polka dot skirt. Which is good, because that's about all my back-to-school budget could handle!
For my next fix: It'll be my birthday week!! Please send more skirts/dresses for school that are cute. I can wear one out on my birthday on September 5th!