Monday, December 22, 2014

The Five Days of BAKE-Mas!


IT'S TWO DAYS UNTIL CHRISTMAS!!!

By the time you read this, it will probably be too late for you to use this idea this year, but I wanted it to be out there!

The last week of school was secret santa time at my school. The survey we were given to fill out was NOT very helpful, so I took matters into my own hands by doing something I called "The Five Days of Bake-mas." Basically, I committed myself to baking something different each night. The ingredients added up to the daily price points, and I felt like it was better than a cheap little $5 gift each day and a $20 gift the last day. I put a lot of effort into each thing I baked, and I just hoped my secret santa did too!

Feel free to copy/steal/borrow my ideas - that's why I'm posting them. I put a link to each recipe so you can make them too! Also at the bottom is a link to get the labels I used for each day. They aren't editable, but if you know how to manipulate them feel free!

Day #1: Spritz Cookies!


I'd had my Spritz cookie gun thingy sitting on the top shelf of my baking cabinet for forever, and thought little Christmas trees would be a nice start to bakemas. I just used the recipe that came with my cookie gun (what is it even called??), but you can use pretty much any recipe for Spritz cookies. Here is the one I used from the package of mine:

Classic Spritz Cookies
  • 3 1/2 cups all-purpose flour
  • 1 teaspoon baking powder
  • 1 1/2 cups (3 sticks) butter, softened
  • 1 cup granulated sugar
  • 1 egg
  • 2 tablespoons milk
  • 1 teaspoon vanilla extract
  • 1/2 teaspoon almond extract
  1. Preheat oven to 350ยบ F. 
  2. In medium bowl, combine flour and baking powder.
  3. In large bowl, beat butter and sugar with electric mixer until light and fluffy.
  4. Add egg, milk, and extracts; mix well.
  5. Add flour mixture; mix well.
  6. Fill cookie press (so THATS what it's called...) with dough and fit with desired disks; press cookies onto ungreased cookie sheet. Do not use with parchment paper (the key is that when the cookies come out of the gun, you WANT them to stick to the surface. They shouldn't stick after they're baked though :) ).
  7. Bake 10-12 minutes or until edges are golden brown. Cool 2 minutes on cookie sheet; remove to cooling rack and cool completely.
Makes 7-8 dozen cookies.

If I remember correctly, I THINK I cut the recipe in half (that was fun with 1 egg...). I wanted to dye the dough green for the trees, but I didn't have any. So I added red, white, and green "ball" sprinkles from the dollar section of Target. I really loved the way it came out, and will definitely do that again!

The sprinkles I used from the $ section of Target

My sprinkles. So cute :)


I put the cookies in a "Chinese Food" container I got from Target - you can get a pack of 5. I only put maybe a dozen since I was going to be baking all week. I didn't want to give her a huge amount each day and overwhelm/sugar her. I gave the rest to my boyfriend to take with him to work. Then I printed the label and taped it on the closed box. It was ready to sneak into her mailbox on Monday!


Day 2: Chocolate Chip Cookies


My family has had a secret recipe for chocolate chip cookies that I almost didn't post here.... except that it's not that much of a secret. Because it's actually just the recipe from the package of Crisco. here is a link to the recipe I used. I usually use a *hint* more of salt, which really makes them extra tasty because they're sweet and salty. These are super tasty and addicting, so I'm really glad I gave the rest to Brandon to take to work again (he was the office hero that week, ha ha ha). I also undercook them just slightly so that they are more chewy. SO good.


I put them in another kind of box that I got in a 3-pack from Target (they have an AWESOME Christmas section. All of the boxes came from the baking part of the Christmas section), stuck the label on and was ready to go!


Side note: I also baked the "balls" for the cake pops the next day on this night

Day 3: Skinny Cake Pops!!


These. Are. To. Die. For. Seriously. SO good. And they are skinny (like 150 calories or less). I got the recipe here from my favorite "Skinny Cooking" blog. Here are a few tips that I found after making these.

The weekend before I did a practice run because these looked a little difficult, and I'm glad I did. It really let me learn what worked and didn't work so that I could make them look much nicer for my Secret Santa.
The balls from my practice run!
Also, I just used the same sprinkles as I did from the Spritz cookies on Monday!

Tips:

  1. Get two (or more) of the Nordic Ware cake pop pans. That way you only have to make two rounds and not 4, because it's a pain in the butt! Target (sadly) didn't have them, but I found mine at Walmart!
  2. Buy another can of non-stick spray. Because you will use up a lot of yours.
  3. Spray the pans A LOT. Because it likes to stick!
  4. Check the package of cake mix - make sure it's close to 16.5, because not all of them are!
  5. Buy 3 - 4 styrofoam blocks. The recipe makes 48 + cake balls, and if you plan on making all of them and not wasting any batter, you will be glad you did.
  6. The Nordic Ware pans each come with a few cake-pop sticks, but you may need more! I got some really long ones at Target (Christmas baking section again), but you can also get some at your local craft store in their baking section. You'll need around 50!
  7. Get actual chocolate melts, not baking chocolate. This was the biggest pain in the butt for me was dipping the balls. I followed the directions exactly and it still didn't get melty enough. I found that Wilton's Candy Melts worked best for me (from Michael's). It still didn't get melty enough, so I followed their directions and added some canola oil and stirred to make it more melty. It adds calories, but it works much better. And yes, you will need 3-4 bags for a full recipe!
    The melts I used
  8. These helped me A LOT. I didn't have these for my practice run, and when I saw these after for my "real round", they saved me a lot of time. Again, they are in the baking section of Michael's, near the cake pop sticks.
    Short Dipping Containers
  9. It's a nice touch to add little packages. These were at Michael's by the cake pop sticks. It came with 50 baggies, and I had to hunt down the colorful twist ties. They were still in the baking section, but where all the baked goods gift containers are. The baggies make it a little neater for the giftee, and easier to share. People can grab one and save it for later if they want, because it's nice and protected in it's little bag :)
  10. No patience, like me? After dipping and sprinkling, pop them in the freezer for a few minutes until the chocolate is no longer sticky before wrapping in their packages!

After I was FINALLY done with these guys, I put as many as I could in the same box from the chocolate chip cookies. I added the label, taped the box, and was ready to go! Again, the boyfriend took the rest to work.


According to my bf, these were gone before 9 am at work. They are SO good. Later my secret santa said the same thing: These were the best thing all week! SO worth the hassle!

Day 4: Oreo Mascarpone Cookies


Omg. I LOVED these. I doubled the recipe because I didn't think it would make a lot, but I probably didn't need to. When I doubled them, I accidentally used half of the butter called for, but these still turned out irresistibly delicious, so if I make them again, I will probably still half the butter to get rid of some fat. You can find the recipe here. I just used regular Oreos, but I bet these would be great with double-stuffed or some other kind of crazy Oreos they have now!

As always, I stuck them in the last box I had from Target, taped it closed, and taped on the tag. One more night to go! Which was good, because I started coming down with a weird virus from my kiddos, starting with tummy pains and an ulcer in my mouth :(


Day 5: Popcorn!

One useful tip that survey DID give me was that my secret santa likes popcorn. So on the day of the big reveal, I gave her two different kinds of tasty popcorn.

Sweet N' Salty Christmas Crunch
Find the recipe for Sweet N' Salty Christmas Crunch here. I made a half recipe and it was still a lot!

Oreo Popcorn
I already had Oreos from the other day, so I used more of them here! I made a full recipe for this one since 1 bag of my popcorn made more than the 5 cups it asks for! Click here to get the recipe!


I used two of the Chinese Food-like containers from the first day of Bake-mas and taped them together. Then I stuck the label in between. I was FINALLY done, and my boyfriend had two huge things of the popcorn to take with him to work. It was less popular since it's harder to take and go, and we are still eating it at home.

All in all, my secret santa said she loved having new things to eat every day! Not sure if I'll do it again next year since the person might know who did it... but we'll see, since I really enjoyed trying all of these recipes! 

To get a free copy of all of the labels I used, click here! I don't have editable ones as of right now, but if you're interested, let me know!

Have a great Christmas! I'd love to see pictures if anyone tries this!

Until next time...Mischief Managed
post signature

Wednesday, December 3, 2014

Stich Fix 7

I came home on Tuesday expecting 1 package (lamination pouches...it's crazy how fast I can go through 100!!) on my doormat. I was a little confused when I saw a second package UNDER my doormat... but nevertheless, I let my dog outside to potty and came back to look at the packages to discover... MY STITCH FIX HAD GOTTEN HERE A DAY BEFORE IT'S SCHEDULED DAY!!! It was like Christmas had come a day early (and it IS the Christmas season)... I was so excited!!

Sidenote: I started my last blogpost about what I wanted from Stitch Fix when my fix description of what I wanted was still editable. I left to run errands, came back and finished the post, and posted it.... only to discover that they were already processing my fix, so I couldn't refer them to my blog post. Womp womp. Still, I had a great description (or whatever it's called), just not so detailed. Moving on... here's my fix!!


Shiny. 
My immediate reaction was disappointment because of the lack of fun prints and bright colors. However about 2 seconds later, I got really excited. I don't have many pieces in my closet with these colors. I have plenty of maroons (gig 'em!), but very few fall plum colors.

My first item was this this Sammy Floral Print Blouse, by Skies Are Blue.


I've gotten a lot from this brand, and the pattern was beautiful and very fall/wintery. However, this blouse was HUGE on me. It was a size small supposedly (the tag said 8, Stichfix tag said S), but you can see in the picture below, it ate me alive!

Cute pattern...

WAY too big! Not appropriate for work!
If it was a more casual shirt, maybe the oversized look would be ok. But because this is more of a nice shirt clearly meant for work, it just did not work. It was more low cut then I'd wear even for going out due to its excess size. This one was not a keeper.

My next piece was this Honey Punch Angelina Striped Knit Top.


All I had to do was touch this shirt to know that I was going to keep it. It is SO incredibly soft!!! I could tell it was also going to be a little big, so I grabbed a white cami to wear under it and tried it on. Omg. I was (and am) in love. It's probably too casual for work (even on jean days), but that's ok. I love how it's soft and a cozy sort of loose.

So soft. So cozy. 

My stylist suggested I pair it with this Look by M Prescott Solid Fringe Detail Wrap Scarf. 


I was a little underwhelmed by this plain colored scarf at first. However, it was also incredibly soft. It's large size also means that I can wear it several ways. When it's cold, I usually just wrap it around my neck, like I did below.


I actually ended up having to run out to the store late this night, and ended up wearing the top and scarf!

Next, I tried on this LA MADE Tatum 3/4 Sleeve Striped Tee


It's just the kind of fit I LOVE in a longer-sleeved tee...I just wish it had more fun colors. I was on the fence about this top until the last second! I ultimately decided to keep it, because it was super comfy and I bet I can get away with wearing it to work ;)


Finally, my last piece was the 41Hawthorn Abrianna Longsleeve Knit Cardigan. 


I don't wear cardigans much, but recently I have been wearing them more. Texas right now is chilly in the mornings (ok...chilly to a Texan is like 50-60) but warmer in the afternoons. A cardigan is perfect for those days, since my classroom is a temp building outside.


I don't have ANYTHING in my closet with this same plum colors, so I grabbed a random top to try it on with the cardigan. I love how I have nothing in my closet like this. I was on the fence about this one too, but decided to keep it. *cough* If you're reading this Stitch Fix stylist, a top to go with it would be ok too :)

All in all, Stitch Fix 7 was different from what I normally get as far as colors go, but I ended up keeping most of it. Can't wait for my next one!!

Until next time...Mischief Managed

post signature

Wednesday, November 26, 2014

All I Want From StitchFix...

Long time no blog! I've been so busy with my second full year of teaching. I've been trying to dedicate my time to my classroom/lessons or relaxing. Last year I was so stressed out that I had to go to a cardiologist for irregular heart palpitations and she said it was due to stress...


Anyways. I'm mainly stopping by for now to tell my StitchFix stylist exactly what I want :) There wasn't enough room in the little notes box, so I thought I'd leave it here since it is a little-traveled blog.


1. More Dresses that I can Wear with Leggings/Tights and Boots

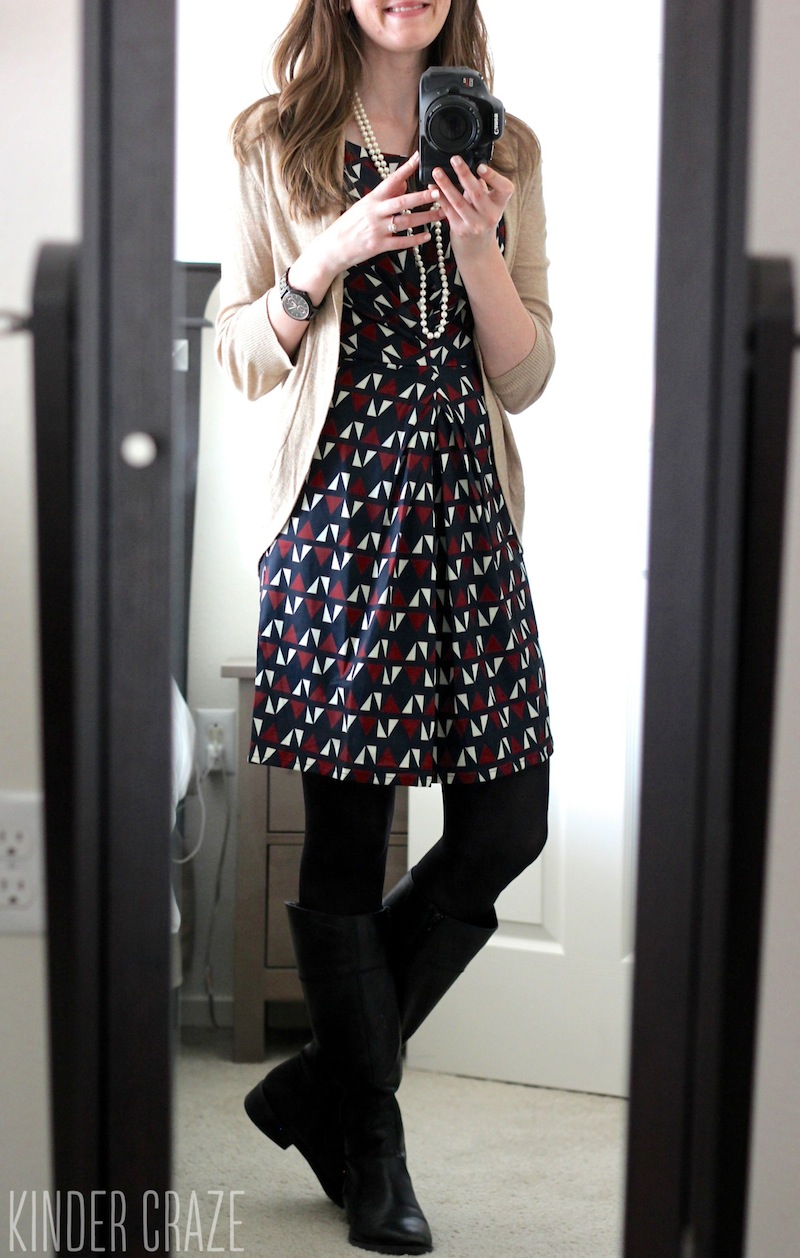
I have one or two dresses that fall under this category. The first one is from a past Stitch Fix, my Market and Spruce Ohara Faux Wrap Tie-Waist Dress.

Market and Spruce Ohara Faux Wrap Tie-Waist Dress
For the longest time I didn't/couldn't wear this dress because the "wrap style" of it made it very low-cut. I tried wearing a cami under it, but I hated the line at my waist that the cami left. Finally i got around to purchasing a slip. I had to cut and sew the straps on the slip myself because my tiny shoulders made the straps appear WAY too long...but I cut like 5 inches off of the straps and sewed it back together, and now I have a white slip and a nude slip to wear under dresses, hooray! I can wear this dress without leggings too, but it's a good one to wear when it's chilly here because of the 3/4 sleeves and thin material (I get hot in thick materials really easily).

The other dress I have that I can wear with leggings and boots is very old. It's from target, and it's getting pretty shabby. I wore it in college to parties when it was cold out since it also has 3/4 sleeves and is made out of a thicker polyester material. It's harder to wear to school though due to it's semi-low cut neck. I have to wear it with a scarf if I want to wear it with leggings to school!

Target Dress
I also have to wear it with different boots than normal... black and brown make a frown, right?


The only other dress-like things I have to wear with leggings are the two long sweaters pictured below. 

It gets shorter every time I wash it...
Comfy Casual


I think the grey is a little too casual for work, and the pink dress just doesn't seem quite appropriate either.


Examples of combinations that I love:
Love the black & white and polka dots :)

Pair w/ leggings!
From one of my favorite Bloggers :)

PS. I pinned all of these to my Pinterest board.
PPS. Long sweater dresses are ok too... see my board on Pinterest :)

2. Sweaters that aren't too think but aren't too thin

I own several sweaters, but they are all from Target and are basically the same style. What I like about them though is that they are a thin but warm (enough for Texas) material. Shown below is one of these sweaters, as well as the rest these Target sweaters that I own.

Thin Target Sweater + Scarf
The rest of my thin Target sweaters.

I love pairing these with a scarf, since the solid color lets them be pretty flexible. However, I would love some sweaters that are less bland, like with fun prints/colors. I get hot very easily though, so super chunky sweaters are not my best friend!


I also own a few more chunky sweaters. I love them, but regret it almost every time I wear them because I get so hot in them!


PS Wool makes me itchy!
3. Pants for Work That Will Fit into Boots

It's finally chilly here in Texas ("chilly" to anyone from up north.... the high is still in the 60s). I love wearing my (only 1 year old but still very worn down) riding boots or one of the other varieties that I have. It's very annoying that I only have a few pairs of pants that are suitable to wear to work (no jeans) that will go into these boots. I get away with colored denim, as pictured below, but those are really all I own that go into boots. I've seen how to change boot cut jeans to skinny jeans for boots, but I don't like that it's still loose and flapping around above where the boots are!
#unflattering #hugehips 
I own these in 3 colors... oops


4. A Winter Party Dress :)
I've got my work/school (I teach) winter party with my fellow teachers, and I'd love a gorgeous wintery dress to wear to the party. I've also got my family's Christmas party to go to, and we usually dress pretty nice for it as well. Not ball-gown style of course, but something like the dress I wore last year (and may reuse I like it so much ;) )

Far away shot

I love the gold lace details at the top, but I also love that it is dark enough to NOT show bra strap. Because I hate strapless bras!

#unflatteringangle #chunkyarms

So there you have it. A long and drawn-out explanation of what I want for Christmas from StitchFix.

Pleeeeeease send me a perfect Fix :)


Until next time...Mischief Managed

post signature

Wednesday, August 6, 2014

Quick Freebee!!

I'll post something longer another day, but I just made these rewards coupons to use in my class next year, and thought I'd share!

FREE PRIZES!!


You can grab them here!

Until next time... Mischief Managed.

post signature

Saturday, August 2, 2014

Stich Fix #2

My second Stitch Fix came in the mail the other day! I thought I'd share what I got in my fix, and even show some some pictures of me trying the things on...don't judge. They're mainly so my stylist can see what the items looked like on me!

My Fix!
The above is a picture of my fix all wrapped up. As you can see, there were POLKA DOTS in my fix! I knew before I even finished taking everything out that I was going to keep whatever that was.
So cute!!
It turned out to be this super cute Filbert Polka Dot Print 3/4 Sleeve Blouse by 41Hawthorn. It's made out of a very nice material, and perfect for work. The front opens a little farther down than I'd like for school, but I can wear a tank under it or something. Brace yourselves... here is me trying on the shirt for the first time. I HATE taking selfies, especially modeling clothing... so no making fun of me!

The whole outfit
As you can see, it's super, super cute. I paired it with khaki shorts from J Crew, and for work I will either wear it with khaki pants or a skirt. The only khaki skirt I own has shrank up enough that I don't know that I can actually wear it to work anymore, but we'll see. 

The next up was this striped dress. I don't remember the exact name because I already threw away the card for it... oops! I got excited because I thought it was the same dress as last month that didn't fit me, but I absolutely loved. However, it was a different striped dress. The material was SO soft, and the length was perfect. However, I didn't like the print at the top, and it was too low-cut to teach in. So I decided not to keep this one.

Piece #2
Next up was the Sharron Shirred Maxi Skirt by Loveappella. I had mentioned in my request this month that I normally don't like maxi's, but was willing to keep trying them. So I was a little nervous, but excited to see one in my fix. 

Normally, maxi anything is too long for my body because I'm pretty short. However, this skirt was a fold/roll down style, so I could play with the length a bit. However, I still ran into my other problem with maxi skirts/dresses: My hips. I am like, triple pear shaped. My waist is tiny, but then my hips are HUGE and jut out, and my thighs are large as well. It's hard to tell in the pictures below, but it looked a little weird. (Stitch Fix stylist: See picture #2, as well as the picture of my pants further down!)

1
2

I tried this skirt on with a shirt I got from J Crew, that is similar to the style I might wear the skirt with. My hips look better with the shirt untucked...but in general, the look is better with the shirt tucked in, in my opinion. You might be interested to know that this skirt could also be worn up higher as a dress. The length obviously got shorter, but it's nice that it's versatile! In the end, I decided to be brave and keep this skirt. The color will go with just about everything, and it's SO comfy and perfect for teaching. 
3
Next up were these pair of colored jeans. Again, I threw the card away. I know the brand was Just Black (even though they're not!). I have no idea if I liked these or not because they were the wrong size. As I mentioned before, I've got a massive thigh/butt/hips area, and so I couldn't even get these size 2 pants up my legs, let alone buttoned up. It's a shame, because I loved the color and my stylist suggested pairing these with the polka dot shirt! Here's the only picture I could share with you, since the others would have had me struggling to get them on...

Too small :(
And finally, we have this pair of Anita Ponte Pants by Liverpool. I wasn't sure I'd like these at first, but I decided to at least try them on, because they were the right material to get away with wearing them to work.

I'm so glad I tried these on! They are so incredibly comfy! They're super stretchy (the tag actually labeled them as leggings), and have pockets in the back (essential for teaching pants, since I need my phone and a place for the mystery walker stick!). There they are below with the same shirt, untucked. The shirt is a little sheer, so it looked a little weird. I also had to roll up the bottoms because they were way long. 
Comfeeeee

She's got a donk.
Here they are with a tucked in shirt. Here you can really see what I mean about the way my hips are shaped! My thighs/butt jut wayyyy out, which gives me a third (and very annoying) curve. That aside, I decided to keep these because they were super comfy. The real decision maker for me was that they are NOT hand wash - they can go in the washer, woo hoo!


In summary: I kept three of the pieces in my fix. Money is REALLY tight right now, but I know the three things that I kept will get a lot of wear-time. I've already worn the polka dot blouse!

What is Stitch Fix?

Stitch Fix is a subscription service, but sooo much better! I had Birchbox for three years, and Ipsy/MyGlam for almost 2. They were great, but not very personalized. That's what I LOVE about Stitch Fix. When you first sign up, you spend about 10-15 minutes filling out a style profile. You fill in information such as your height, what sizes you wear in various kinds of clothing (skirts, pants, shirts, etc.), and what your style is. You can even tell them not to send you things in a certain color (no orange for this Aggie), not to send kinds of clothing, etc. You also tell them how much you're willing to spend on certain items. 

Like I said, super personalized! In addition to the style profile, you can also provide them with a link to your clothing Pinterest board! That way, they can scour your board to really get a feel for what your style is! They encourage you to write notes to your stylist on your Pinterest board explaining exactly why you like each thing you pin! Finally, each month/fix you can write a little note to your stylist, telling them what kinds of events you may have going on, or what kinds of things you would like to see more of! For example, September 5th is my birthday, which is about a week after I will get my next fix. I plan on asking my stylist for something nice to wear on my birthday... as well as something maroon to wear to the Aggie football games that are starting in LESS THAN A MONTH! WHOOP!!

How much does it cost? You pay $20 every fix. That is considered a "styling fee." Your stylist will hand pick five items just for you, based on your style profile. Once you get your box (free shipping!), you have three days to try on your pieces. But it's better than regular shopping, because you can try them on in privacy, with all of your clothing you already own. Hang what you want to keep, fold up and send back what you don't in the pre-paid return envelope, and complete an online checkout, explaining why you kept/returned things. This helps your stylist pick things next time! It's super simple. Oh yeah, and that $20 stylist fee? It turns into a credit you can use on your fix, as long as you get at least one item. So if something cost $55, it would cost $35! Finally, if you buy everything in your fix, you get $20 PLUS %25 off!

Want to try Stitch Fix for yourself? Click here to get started!

Until next time...Mischief Managed. 


post signature